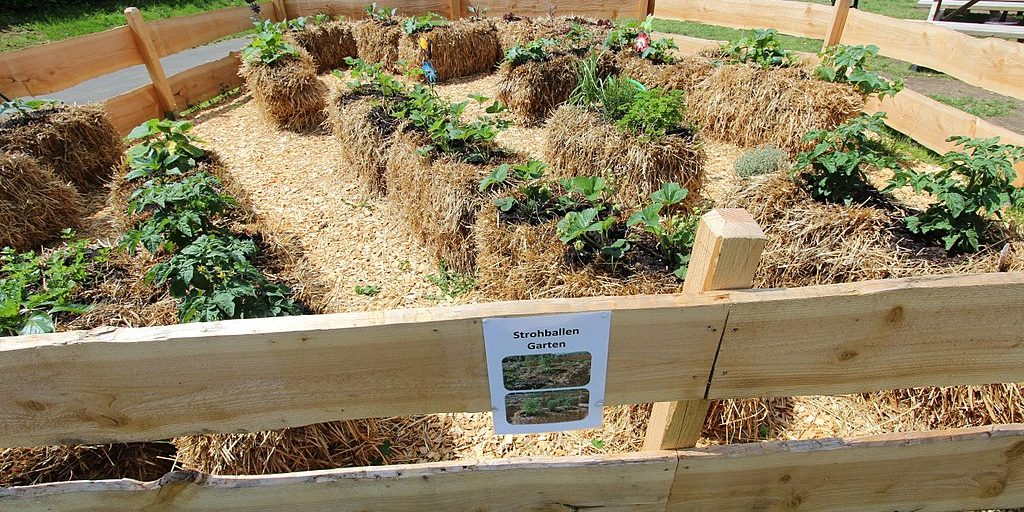
It’d be tempting to dismiss Straw Bale Gardening as a fad that has come and gone, but the truth is it may be an answer to several gardening problems you may have.
Do you have rocky, uneven or unyielding clay soil? Are you unable or unwilling to dig up a big plot of ground to prepare the soil? Is it difficult for you to stoop or bend to garden? Is your only full sun growing area in your driveway or on your deck or patio?
Straw Bale Gardens are a mud-free, weed-free medium that turn to mulch after a growing season or two. You can put them right where you want them, and they conveniently raise your plants up to a manageable height. You can grow almost any vegetable, herb or annual flower in a straw bale. You can tuck a few bales along the side of your house or garden wall. You can plant a wonderful herb garden right next to your kitchen door, even on your concrete patio.
If you are concerned about how attractive they’ll look, you can plant flowers and vines along the sides and camouflage the straw.
GETTING STARTED
You can plan on two to three tomato plants, four pepper or cucumber plants, or four to six lettuce plants per bale. Remember that tomatoes will have to be staked or on a trellis (always use the longest stakes you can find; the tomatoes will rise to the challenge and grow to the top). You could even grow an early crop of sugar snap peas on the supports before you start the tomatoes.
After figuring how many bales you’ll need for the plants you intend to include, purchase, bring home and lay out your bales. Plan your layout carefully, as the bales become very heavy after being soaked with water and fertilizer during the preparation phase. Gardeners seem to be divided on the best way to lay the bales down…string side on the ground, or string parallel to the ground, so follow your fancy on this one. If you are laying out your bales in side-by-side rows in your yard, leave enough space between them to mow the grass. Think about what you’ll be planting in each bale. Remember that whatever you plant will want all of the sun exposure you can find.
Hay bales are not generally recommended for straw bale gardening, as they include seeds that may end up becoming weeds in your garden. Depending on decomposition, you may be able to use your straw bales for two seasons, but eventually you’ll break them up and use as mulch in other areas of your yard.
PREPARE THE BALES
You’ll have to prepare the bales and then make sure they’re past the initial heat of decomposing before you plant. With the proper fertilizers and water your straw bale should warm up to a temperature of about 100 degrees. As in many gardening techniques, there are proponents of several different methods. You can prepare your bales by just keeping them wet for three to four weeks prior to planting. If you prefer a more proactive approach, here’s one widely recommended method.
Days 1-3: Water the bales thoroughly and keep them damp.
Days 4-6: Sprinkle each bale with 1/2 cup of a high nitrogen fertilizer like ammonium nitrate (34-0-0) or ammonium sulfate per day, and water it well into the bales. If you’d like, you can substitute blood meal for the nitrate.
Days 7-9: Cut back to 1/4 cup of fertilizer per bale per day, and continue to water it in well.
Day 10: No more fertilizer, but continue to keep the bales damp.
Day 11: Stick your hand into the bale. If it has cooled down to less than your body heat, you may safely begin planting as soon as all danger of frost has passed. Organic gardeners often follow a similar method to condition the bales, substituting a natural fertilizer such as fish emulsion or compost tea.
PLANTING
You can grow plants from seeds or transplants. To sow directly, top dress each bale with a couple of inches of seed starting mix and water in well. To transplant, use your hands or a trowel to make a crack in the bale for each plant. Add a little commercial potting mix around each plant. Do not use soil from your yard! It could spread diseases, bacteria and weeds to the bales. Place the plant inside, and gently close the crack back together. Fertilize and water as necessary as your plants begin to grow. Don’t let the bales dry out; you may need to water more than once a day in the beginning. As the bales begin to decompose, they will hold more water and you should be able to water less frequently. A soaker hose placed over the tops of the bales is a great way to gently deliver water to your plants.
http://www.growandmake.com/straw_bale_garden
[/vc_column_text][/vc_column][/vc_row]


